Featured Brands
Recommended Products
WINTER20
|
Get free shipping, on most items, with your $50 purchase today! Same day shipping on most orders if placed by 3pm PST.
PLEASE NOTE:
This offer is only available to physical shipping addresses in the 48 continental United States (no PO Boxes), and some exclusions apply.
Oversize Charges
Some large and/or heavy items are subject to additional oversize charges that are separate from standard shipping costs.
Bike Build Process
All bikes are built, tested, tuned, and ready to ride upon shipment. The bike build process typically takes 2-3 days to complete depending on the bike model and the complexity of the build.
Stock Status
Orders for in-stock items placed by 3PM PST usually ship on the same day. Orders that include special-order or backordered items may be subject to shipping delays depending on product availability. Refer to estimated delivery times in cart when selecting shipping options.

Our Gear Advisors are Ready to Help.
Dropper seatposts are a great way to broaden the capabilities of your bike. Droppers posts are becoming quite popular on modern mountain bikes and have even found their way onto some gravel bikes as well.T hey allow you to set the perfect seat height for efficient pedaling, then drop the saddle out of the way when you start your descent. This allows you to move the bike underneath you unencumbered, putting your body in a more controlled position to take on whatever the trail throws at you. You can also drop the saddle just slightly from full height for technical pedal sections where you need your bike to be a bit more nimble.
Whether your bike came with a dropper and you’re wanting to upgrade, or you are adding a dropper post for the first time, it can be challenging to make sure that you have all the right measurements to ensure proper compatibility, performance, and function. We’ve compiled this guide to answer your questions, and give you the confidence to choose the right post for you and your bike. If, after reading this, you still aren’t sure, hit up our and they will be able to direct you to the proper post for your needs.
In this guide we will define each of these measurements, show you how to measure them, and give you the knowledge to translate the measurements you find into the correct dropper for your setup.
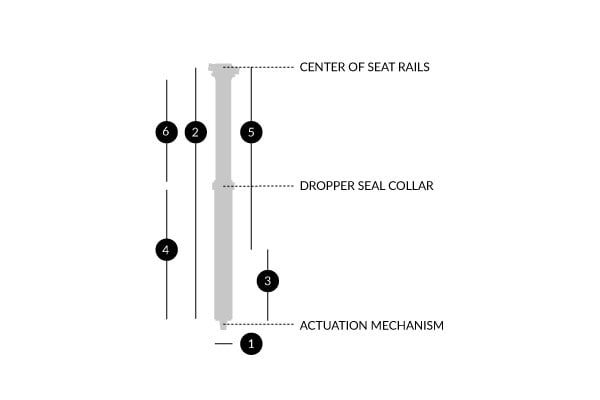
The distance from side-to-side of your seatpost.
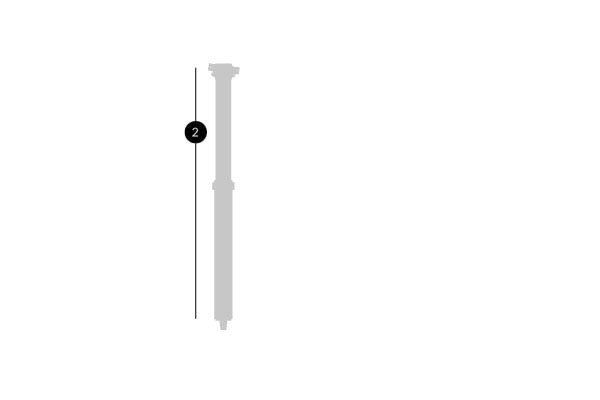
The distance from the bottom of the post (not including any actuating mechanism) to the middle of the saddle rail clamps.
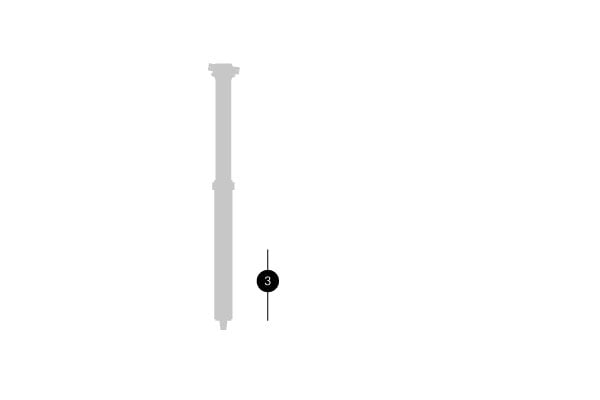
This is the absolute least amount of seatpost that must be clamped inside your frame’s seat tube for safety reasons, and is indicated on the seatpost by horizontal line with “Minimum Insertion” printed at this point. Never ride with your post installed below this line.
This is the distance measured from the bottom of the post (not including any actuating mechanism) to the bottom of the seatpost collar. Your frame also has a maximum insertion length which may be less than a given seatpost.
FRAME MAX INSERTION LENGTH
This is the distance from the top of the seat tube collar to the first bend, bolt, or boss in your frame that would stop your post from entering deeper into your frame.
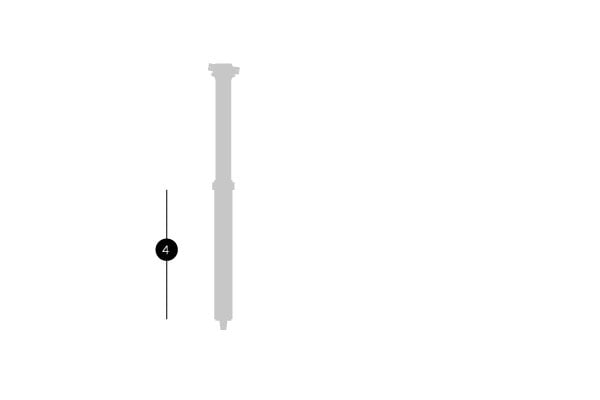
The distance from the bottom of the seatpost collar to the middle of the saddle rails clamp. This number can also be deduced from taking the overall length – the maximum insertion length.
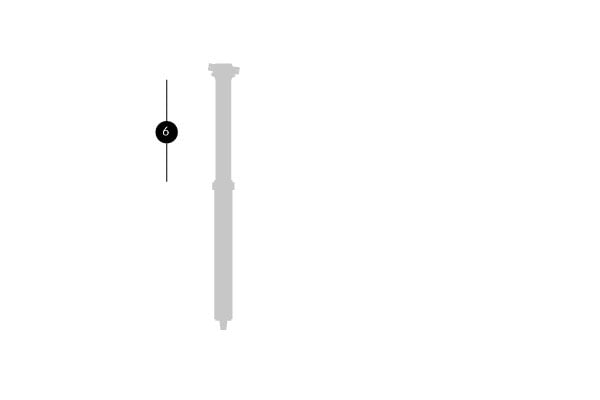
Usable Height = this is the equal to the stack height + any exposed seat post between the dropper seal collar and the frame’s seatpost collar.
Max Seatpost Height = the distance from the top of your frame’s seat collar to the middle of your seat rail clamp when riding at full extension of your legs.
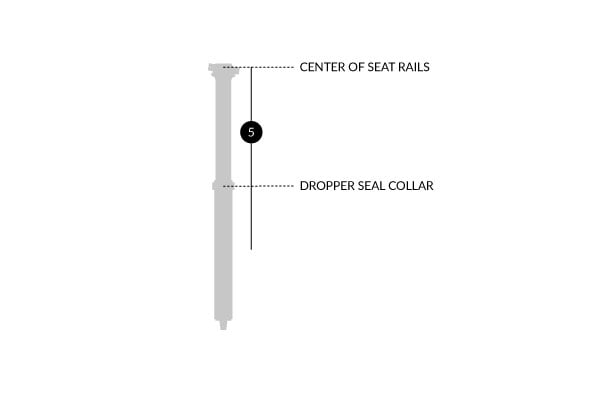
This is the distance of the exposed stanchion (the sliding surface of your dropper that moves up and down) from the top of the seatpost collar to the bottom of the saddle clamp head
Now, that we’ve looked at what the various dropper post measurements are, let’s delve into how to use those measurements to find the right post for you, your bike, and your riding style.
The first step in finding the right dropper post is determining your frame’s remote cable routing option. Most newer frames are setup to run the remote cable internally to the actuator mechanism on the bottom of a dropper post. This is known as an internal dropper or “stealth” routing. Some frames only have external routing, and will require a dropper that has the actuating mechanism outside of the frame at the dropper seal collar or at the saddle clamp.
The next step is to determine your frame’s seat tube’s inner diameter. Your seatpost and frame seat tube diameter should match, and the measurement is usually printed on your current seatpost, or can be found in your frames specification lists.
It is possible to run a smaller diameter dropper with the use of seatpost shims, but this does introduce another part where slipping or twisting of your seat could happen. The most common sizes of diameters are 27.2, 30.9, 31.6mm with a newcomer of 34.9mm starting to become more common.
Next, you will want to determine the stack height that will work with your frame and riding position at full extension. Stack height is composed of the dropper post collar + travel + saddle clamp (measured at the middle of the saddle rail clamp). It is important that the stack height is equal to or less than your current max seatpost height.
It is okay for this measurement to be less than your current max seatpost height so long as you do not expose the minimum insertion point. As a general rule, we try to equal the max seatpost height to the usable height + ~15-20mm of exposed seatpost below the collar to give some fine-tuning wiggle room (usable height). If the stack height is greater than your current max seatpost height, it will be hard to reach the pedals and will make for an uncomfortable ride, or reduce the amount travel that you are able to use
Lastly, you will want to determine your frame max insertion length. This will determine what your maximum insertion length can be of your dropper, and may affect the usable height of your dropper. Using a dropper’s full maximum insertion length so that it sits collar-to-collar with your frame looks really “pro,” but it does limit the ability to fine-tune your fit. This is why we recommend including about 15-20mm of seatpost in your measurements
Once you have determined these 3 measurements, you will be ready to find the right combination to fit your frame and riding position. If you’re still scratching your head, don’t worry. Our Gear Advisors are a great resource to make sure you pick the perfect match.
Due to brand variations in seatpost collar and saddle clamp stack heights, the you may find that one brand allows you to have more travel for the same usable height measurement versus another. Also, different internals allow the various brands to have differing maximum insertion lengths for post with similar travel. Additionally, variations in internal actuation mechanisms can add between 30-80mm to your maximum insertion length. Be sure to account for this when choosing your next dropper post.
Another factor to be considered in this is the stack height of the given saddle that you use. A shorter stack height (from saddle rails to the top of the seat) will allow you more room to work with in your seatpost travel.
The amount of travel you need will depend on your riding style. XC and gravel bikes tend to need less travel (60-100mm) versus trail and enduro bikes which can benefit from long drops (125-180mm). Dropper travel can be limited by frame size, rider height, and frame geometry. We tend to consider consider travel numbers last because they rely on several other more crucial factors.
| FRAME SIZE | RECOMMENDED DROPPER TRAVEL |
|---|---|
| Extra Small | 60-100mm |
| Small | 80-125mm |
| Medium | 100-150mm |
| Large | 125-160mm |
| Extra Large | 150-200mm |
SHOP NOW
SHIP ALMOST ANYTHING & SAVE
SHOP NOW
SHOP NOW
SHOP NOW