Featured Brands
Recommended Products
WINTER20
|
Get free shipping, on most items, with your $50 purchase today! Same day shipping on most orders if placed by 3pm PST.
PLEASE NOTE:
This offer is only available to physical shipping addresses in the 48 continental United States (no PO Boxes), and some exclusions apply.
Oversize Charges
Some large and/or heavy items are subject to additional oversize charges that are separate from standard shipping costs.
Bike Build Process
All bikes are built, tested, tuned, and ready to ride upon shipment. The bike build process typically takes 2-3 days to complete depending on the bike model and the complexity of the build.
Stock Status
Orders for in-stock items placed by 3PM PST usually ship on the same day. Orders that include special-order or backordered items may be subject to shipping delays depending on product availability. Refer to estimated delivery times in cart when selecting shipping options.

Our Gear Advisors are Ready to Help.

Traveling with your bike can take you on all sorts of adventures, but sometimes it can be an adventure just trying to figure out how to safely take your bike with you. This guide is full of tips and tricks to help ease the pain of protecting your steadfast stead and finding new adventures on two wheels.

Traveling with your bike. It can lead to some of the most amazing experiences of your life, but it can also be pretty daunting, and frustrating. I’ve been doing it for a number of years now and feel like I can share some tips and tricks with y’all.
First things first, it’s almost always easier to drive. If your destination is on the same continent and you have all the time in the world to get there, drive. Unfortunately, most of us don’t have all the time in the world, and fortunately, sometimes our travels take us overseas, so those two factors often lead to us flying with our bikes. The tips below are geared towards flying since that’s the option most of us are least familiar with.
Know your airline baggage policies. This is probably the most important part of this blog. There are HUGE variances in the amount you can be charged for travelling with your bicycle. Like, I’m talking $50 to $200. You do not want to be surprised by a $200 baggage fee when you arrive at the airport. Also, the people at the check-in counters usually have NO IDEA what their bicycle policy is, and usually err on the side of charging you more. I have been charged different amounts for the same bike on the same airline in one trip before. Because of this, I have taken to printing off the policy so I can show them if they try to charge me extra. They may also try to charge you both for being overweight AND being a bike. I don’t think any of the airlines can do this unless the bike is over 70lbs.
In addition to cost, you also need to pay attention to weight and size allowances. In some cases you may be able to jam tons of other gear into your bike bag as long as it doesn’t add up to over 70 lbs. In other cases, you are getting charged for the weight, rather than the bike, so you might try to keep the weight under a certain amount. Below is a chart with the major US/Canadian carriers and their baggage policies in order of best to worst. Keep in mind, fares change often, so don’t rely on this chart. When I looked this up, some airlines had already changed their policies since last time I checked.
The cost to fly with your bike also influences buying your tickets. Sure, that United flight may be cheaper than the Southwest flight, but you’ll be paying extra each way to transport your bike, so maybe the Southwest flight is better after all. Speaking of United: If you’re travelling to Canada on Air Canada, be very careful that your flight is not “operated by United”. If it is, you will be charged United’s baggage fees. Overseas flights are generally cheaper, but some airlines are definitely better than others. I have seen overseas flights charge up to $200 and as little as $0.
Shipping your bike is another option. I’ve done this a few times using ShipBikes.com. It’s convenient in that you don’t have to lug a big box/bag around with you at an airport, and depending on the airline you book your flight with, and your destination, it can be cheaper. The inconvenience is that you’re counting on the shipment coming on time to get your bike on time. You can ship to any FedEx location, so having an address isn’t critical, but it can be risky if you’re on a schedule. I once had my bike show up a day and a half late. Luckily, in that case, I didn’t have a race to make, so I just missed a day of riding, but it was still not ideal.

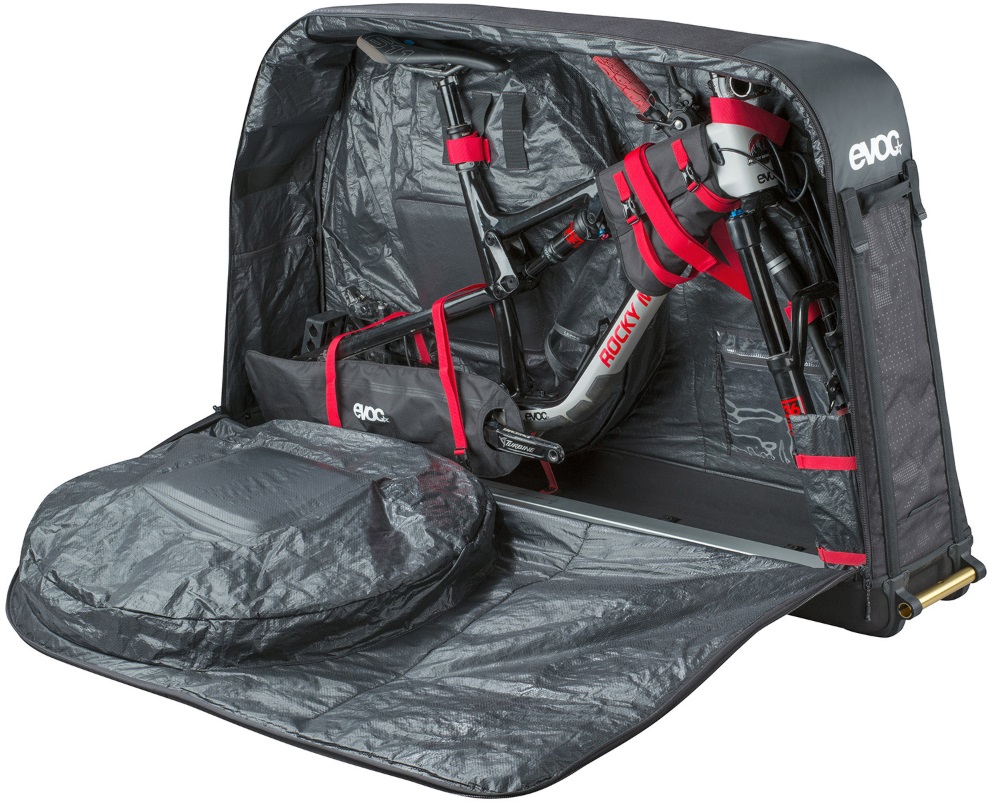
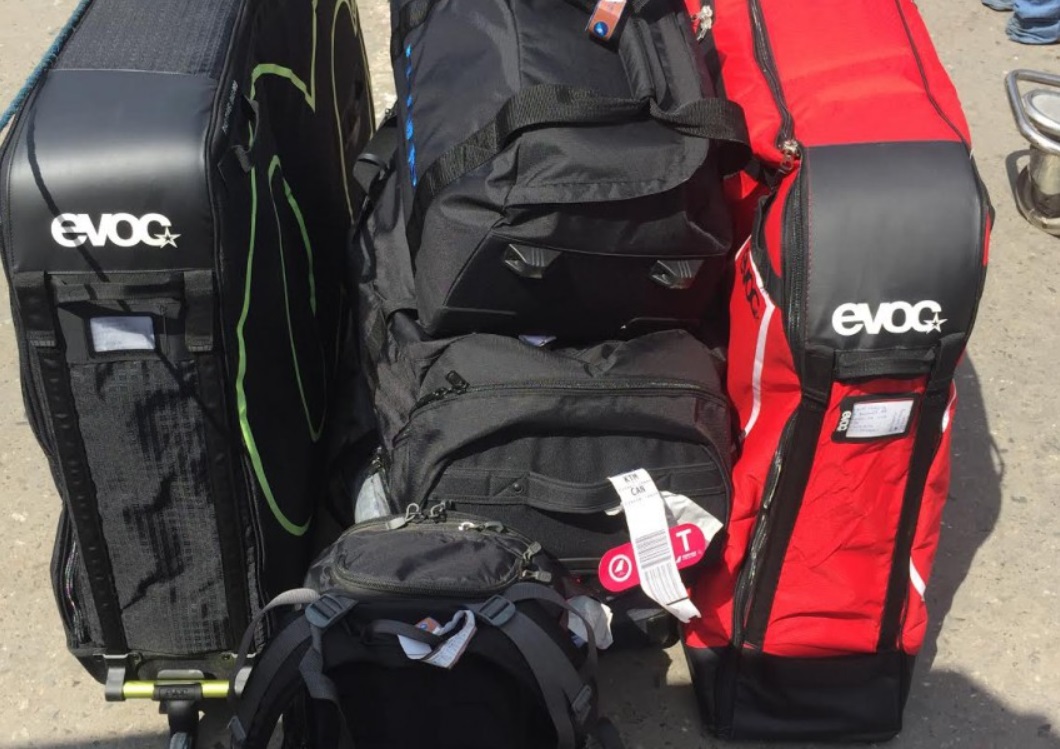
You can pack your bike a few ways. You can use a regular cardboard bike box that you can get at your local bike shop, or a bag/box designed specifically for carrying a bike. I love my new EVOC bag because it makes packing simple and seems to offer good protection, but for a number of years I used a big plastic case from Trico. A cardboard box or the EVOC bag or similar can be handy if you’re renting a car at your destination because they can fold down smaller than a big case.
I’ve had to fit my bike box and my built up bike in some mighty small cars before and it’s always a struggle. I won’t get into details on how to pack the bike inside the box (you can find good videos on YouTube) but I will offer these tips:

This isn’t as bad as it sounds. Even if you’re a real dumb mechanic like myself, the bits you need to take off your bike to pack them are pretty easy ones. Everything can be done with a good multi-tool in a pinch. Depending on the bike and the case, the most you will have to remove are as follows:
Vacation rentals are my favorite things ever. If you’re traveling in a group, they are often as cheap or even cheaper than staying in a hotel, and you have a kitchen so you can save money on food and cook for yourself. Compared to hotels, they are also usually roomier and better equipped for handling bikes (ask if they have a hose!), and often have laundry machines. If you’re traveling on your own or just 2 of you, sometimes it’s not economical, but I wouldn’t exclude vacation rentals from your search criteria.
If you go with the hotel option, ask to make sure you can bring your bike into your room with you. Try not to ram your pedals and bars into hotel walls and doorjambs, and keep your bike clean. We want hotels to like us. Also, it’s nice to have a first floor room so you don’t have to lug your bike up stairs or jam it into an elevator every time you want to go to your room. Usually if you ask, one is available.

Camping is another great option, but is mostly applicable if you’re driving, as it’s unlikely you’re lugging all your camping gear as well as your bike on the plane.
When you take your bike apart, you will see what tools were necessary to do that. Bring those. You’ll definitely want to bring spare tubes and a pump, and all your usual Camelbak contents. Remember if you’re the C02 type, that you can’t take C02 cartridges on a plane. Also, if you’re packing your nice multi-tool, do yourself a favor and put it in your checked luggage. Security may make you throw it away, even though it has no sharp parts, if you try to bring it carry-on. You may also want some spare parts. If you’re going somewhere where you know you’ll have quick and easy access to a good bike shop, this might be less important, but if you’re going somewhere more remote, you’ll want a few spares.
I usually bring a spare derailleur, a spare tire, and a spare brake at a minimum, especially if I’m going to a race, or when not being able to ride will completely ruin my trip. It’s always nice to have more tools and more parts, but they add to weight and take up space, and you have to consider if you would know what to do with those tools/parts if you needed them. For example, my husband usually will pack a bleed kit for brakes, but I never would do that if he weren’t going because I don’t know how to bleed my brakes and would just take my bike to a shop. If you’re trying to fit everything in one bag, ignore all of this – sometimes the best you can do is a set of Allen wrenches and a bit of hope that you won’t break anything critical.

As for other gear, helmets are good carry-on items because they take up lots of space in a suitcase and can pretty easily be strapped to the side of a small bag. You also may not want to trust baggage handlers with the thing that is going to protect your noggin on your trip. They’re also great conversation starters if you like to chat to your neighbour on the plane. Knee pads are great for using for padding when you’re packing your bike. Shoes can also be thrown in a bike bag, or if you put them in your suitcase, fill them with socks to optimize your use of space. Don’t overpack on clothes. Yes, bring enough chamois(es) so you can have new ones every day (or at least almost every day!!) but jerseys dry out quickly if you wash them in the sink, and shorts can be worn more than once. Do remember however, to pack for all weather possibilities. A raincoat, leg warmers, warm gloves etc. are always a good idea if there is any chance of cold or wet.
So those are my major tips for traveling with your bike, but I did forget the most important one of all: HAVE FUN. Traveling with your bike is one of the coolest things you will ever do, it’s 100% worth all the planning and packing!
Now go ride your bike!
SAVE 20% ON FIDLOCK
SHOP NOW
SHIP ALMOST ANYTHING & SAVE
SHOP NOW
Follow Jensonusa